
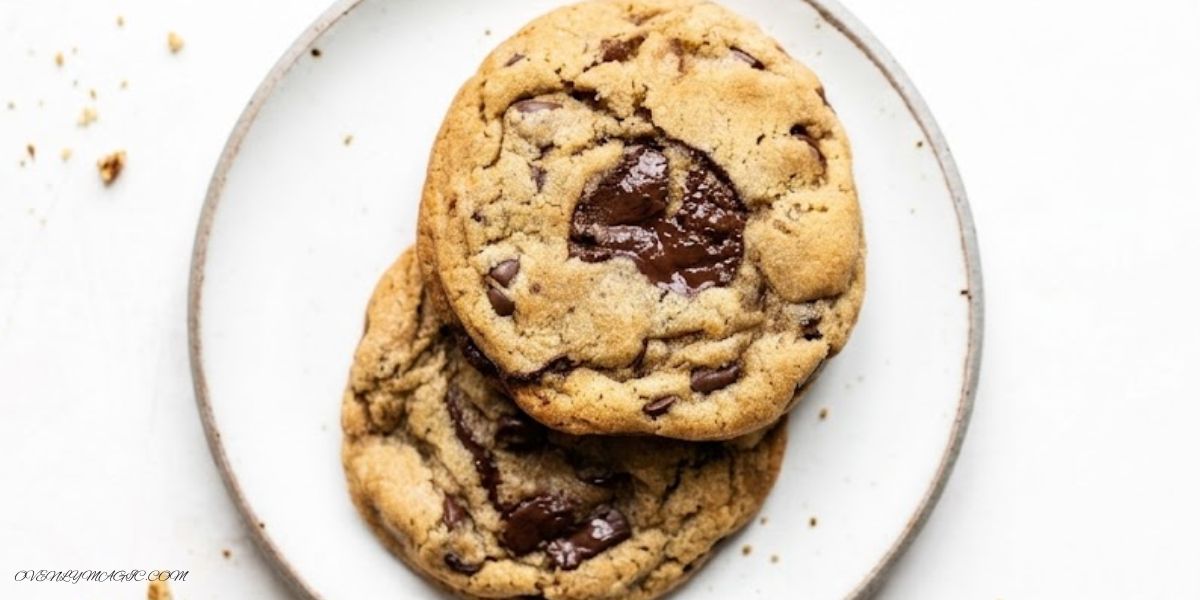
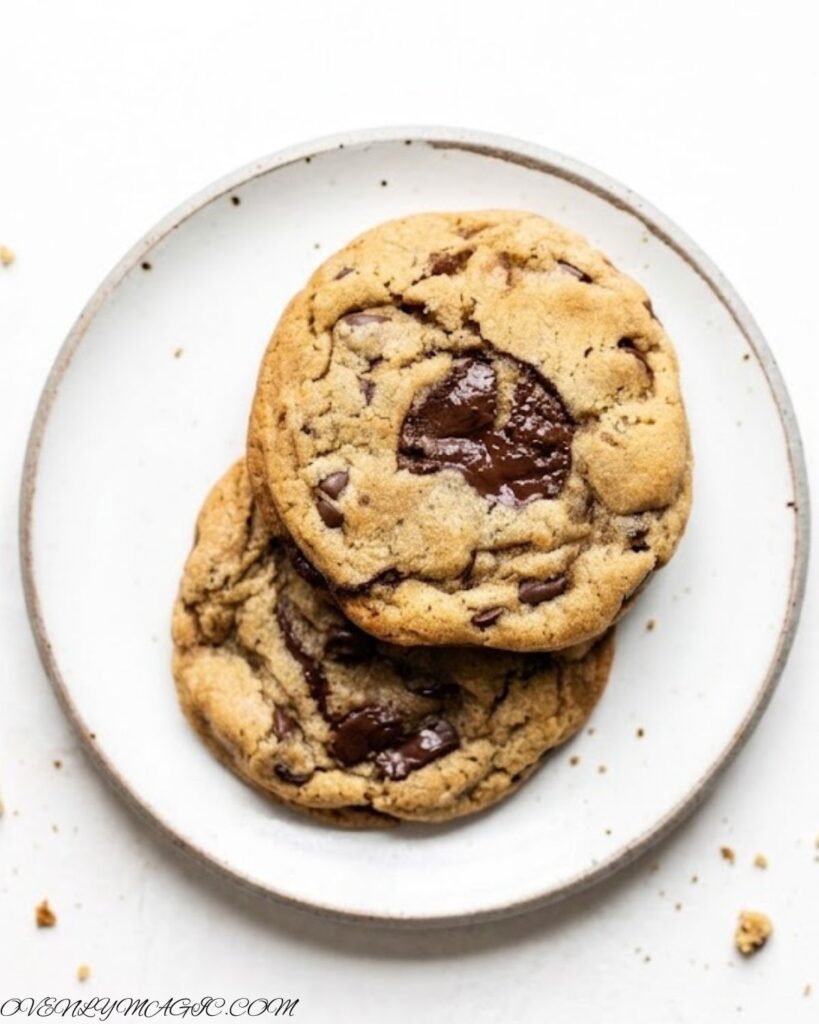
If your cookies turn out flat, greasy, or lacking flavor, these brown butter chocolate chip cookies will completely change your baking game. After testing multiple batches, this recipe is perfected to give you crispy golden edges, chewy centers, a nutty brown butter aroma, and rich chocolate flavor in every bite. The secret? Browned butter, which adds a deep caramelized taste and elevates these cookies to bakery-style gourmet quality at home.
Why You’ll Love These Cookies
Easy step-by-step instructions (beginner-friendly)
Even if you’re new to baking, this recipe is designed to be simple and foolproof. Each step is clearly explained so you can achieve consistent, bakery-style results without any confusion.
Crispy edges with soft, chewy center
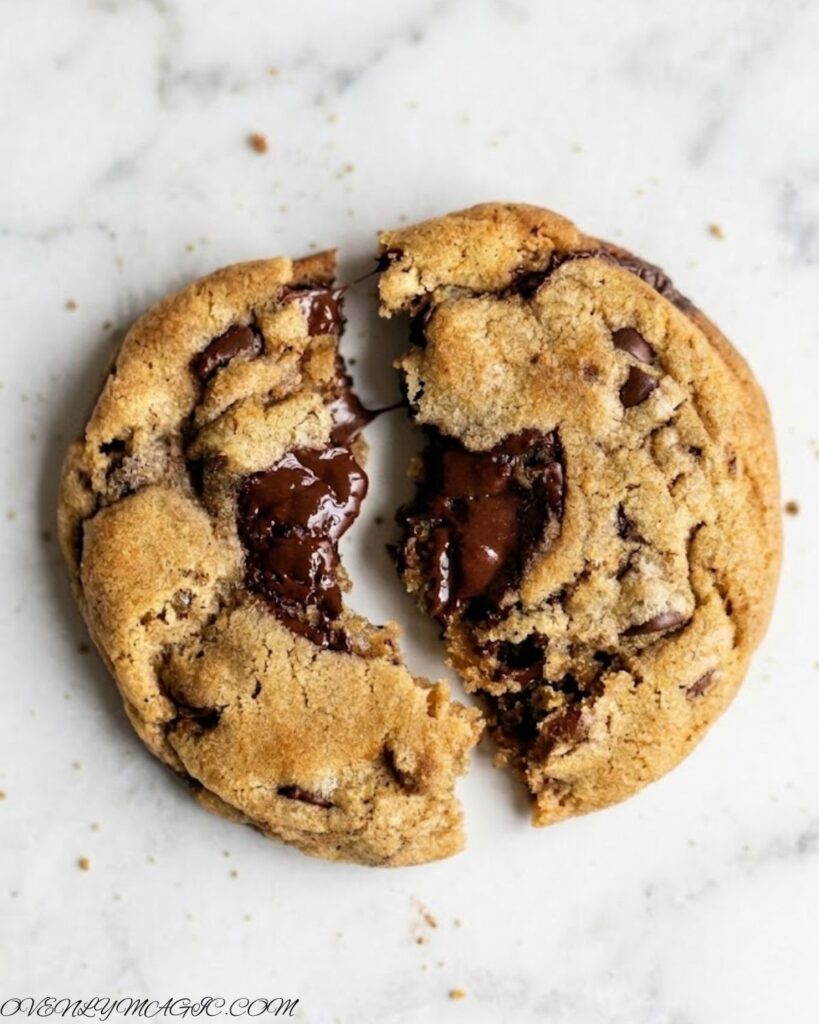
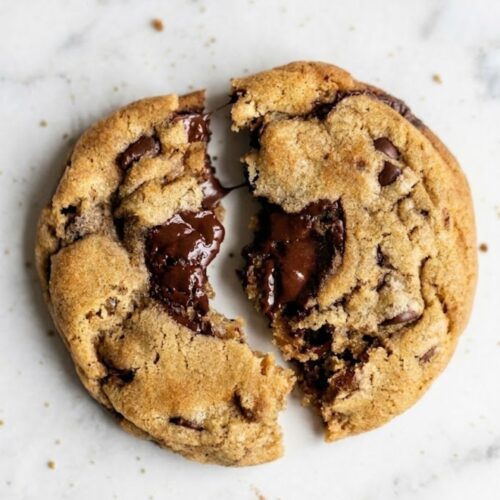
These cookies have the perfect texture balance, golden, slightly crisp edges with a soft, gooey, chewy center. This contrast in texture makes every bite incredibly satisfying.
Deep caramel, nutty brown butter flavor
Browning the butter creates a rich, toasted, caramel-like flavor that takes these cookies to the next level. It adds depth, aroma, and a slightly nutty taste you won’t get from regular butter.
Uses simple pantry ingredients
No fancy or hard-to-find items needed. Everything in this recipe is made with basic baking staples like flour, sugar, butter, and eggs, making it convenient and budget-friendly.
Perfect for tea-time, and gifting
These cookies are ideal for special occasions like family gatherings or casual tea-time snacks. They also make a great homemade gift thanks to their rich flavor and professional look.
Dough can be chilled or frozen
You can prepare the cookie dough ahead of time and store it in the fridge or freezer. This not only enhances the flavor but also makes it easy to bake fresh cookies anytime you want.
Ingredients You’ll Need For Brown Butter Chocolate Chip Cookies
- 1 ½ cups (190g) all-purpose flour – Provides structure and soft texture
- 1 cup (127g) bread flour – Adds chewiness and improves cookie texture
- 1 tsp baking soda – Helps cookies spread and rise properly
- ¼ tsp baking powder – Adds lightness and balance
- 1 tsp fine sea salt – Enhances flavor and balances the sweetness
- 2 sticks (227g) unsalted butter (browned) – Creates a deep, nutty, caramelized flavor
- ½ cup (100g) granulated sugar – Helps create crisp edges
- 1 ¼ cups (250g) dark brown sugar – Adds moisture and chewy texture
- 2 large eggs + 1 egg yolk (room temperature) – Provides richness, structure, and softness
- 2 tsp vanilla extract – Enhances overall flavor profile
Add-ins (Chocolate Layer)
- 1 ½ cups (255g) semisweet chocolate chips – Classic chocolate bursts
- 1 cup (140g) semisweet chocolate wafers (e.g., Guittard or Valrhona) – Melty pools of chocolate for bakery-style finish
Optional Topping
- Flaky sea salt – Adds contrast and enhances sweetness (gourmet touch)
How to Make Brown Butter Chocolate Chip Cookies
Step 1: Brown the Butter
Start by melting the butter in a small saucepan over medium heat. Be patient here first, it will melt, then become foamy, and you’ll hear a gentle crackling sound. Once the crackling stops, keep swirling the pan until you see golden brown bits forming at the bottom and smell a rich, nutty, caramel-like aroma. Immediately pour it into a bowl so it doesn’t burn.
Step 2: Add Sugars & Let It Cool
Add the granulated sugar and brown sugar to the warm brown butter and mix well. Now let this mixture cool completely. This step is important so your eggs don’t cook when added.
Step 3: Prepare Dry Ingredients
In a separate bowl, whisk together the all-purpose flour, bread flour, baking soda, baking powder, and salt. This helps everything mix evenly and gives you a consistent cookie texture.
Step 4: Add Eggs & Vanilla
Once the butter mixture has cooled, add the eggs and extra egg yolk. Pour in the vanilla extract and gently mix until smooth and combined.
Step 5: Combine Wet & Dry
Gradually add the dry ingredients to the wet mixture. Mix gently and only until combined. Do not overmix, or your cookies may turn out dense instead of soft.
Step 6: Add Chocolate
Fold in the chocolate chips and chocolate wafers. At this stage, your dough will look rich, thick, and packed with chocolate
Step 7: Chill the Dough
Wrap the dough and refrigerate for at least 2 hours (overnight is even better). Chilling enhances flavor and prevents the cookies from spreading too much.
Step 8: Prepare for Baking
Preheat your oven to 180°C (350°F) and line your baking trays with parchment paper. Take the dough out and let it sit for a few minutes until it’s soft enough to scoop.
Step 9: Shape & Bake
Scoop about 3 tablespoons of dough per cookie and place them on the tray, leaving space between each. Bake for 11–13 minutes until the edges are golden, and the centers are still slightly soft.
Step 10: Cool & Enjoy
Let the cookies rest on the tray for 5 minutes before transferring them to a wire rack. Sprinkle a little flaky sea salt on top if you like, it adds that perfect bakery-style finish
Expert Baking Tips For Perfect Chocolate Chip Cookies
1. Chill the Dough:
Chilling your cookie dough is a game-changer. It allows the flavors to deepen and the butter to solidify, which prevents your cookies from spreading too much in the oven. If you chill overnight, the cookies develop an intense nutty flavor from the brown butter and a chewy, melty center. Even a 2-hour chill will improve texture noticeably.
2. Use Brown Sugar (and White Sugar Combo):
Brown sugar is hygroscopic, meaning it attracts and retains moisture, perfect for those soft, chewy centers. White sugar, on the other hand, helps cookies develop crispy golden edges. Using both creates that classic soft-chewy-crisp contrast that makes cookies irresistible.
3. Don’t Overbake:
Cookies might look slightly underdone when you take them out, but that’s okay! They continue to cook on the tray for a few minutes. Overbaking dries out the centers and kills that soft, chewy texture we all love. Look for golden edges with a tender middle as your visual cue.
4. Quality Chocolate Matters:
Chocolate is the star of these cookies, so don’t skimp! Using high-quality chips or wafers (like Guittard or Valrhona) ensures rich, melty chocolate pockets with deep flavor. Cheap chocolate can be waxy, gritty, or lack flavor, which really affects the final taste. Pro tip: mix chunks and chips for texture contrast, gooey centers, and slightly chewy bites.
5. Measure Flour Correctly:
Flour is sneaky, too much, and your cookies will be dry or cakey. Use the spoon-and-level method: scoop flour into your measuring cup with a spoon, then level it off with a flat edge. This gives the right balance of structure and chewiness every time. Avoid scooping directly from the bag, as it packs flour and makes cookies heavy.
Common Mistakes to Avoid
1. Not Chilling the Dough:
Skipping the chill might seem faster, but it often leads to flat, spread-out cookies. Chilling firms up the butter and sugar, helping cookies hold their shape and develop deeper flavor. Even 30 minutes in the fridge can make a noticeable difference!
2. Overmixing the Dough:
Once you combine wet and dry ingredients, resist the urge to overmix. Overmixing develops gluten, which can make your cookies tough and dense instead of soft and chewy. Fold gently until just combined.
3. Adding Eggs to Hot Butter:
If your browned butter is too hot, adding eggs can cook them instantly, leaving little scrambled egg bits in your dough. Always let the butter cool slightly before mixing in eggs.
4. Overbaking:
Cookies continue to cook slightly even after coming out of the oven. Overbaking dries out the centers and makes cookies less chewy. The trick: bake until edges are golden and centers look just set, then let them rest on the tray for 5 minutes.
5. Measuring Ingredients Incorrectly:
Too much flour, too little sugar, or too much salt can ruin texture and flavor. Use proper measuring techniques: spoon and level flour, use a liquid measuring cup for liquids, and weigh chocolate if possible for the best results.
6. Using Low-Quality Chocolate:
Chocolate is the hero here. Cheap chips can be waxy or bland, which makes the cookies less indulgent. Always opt for high-quality chocolate chips or wafers, the flavor and melt are worth it!
Variations & Flavor Ideas
- Nutty Twist: Add chopped walnuts, pecans, or almonds for a crunchy contrast to the chewy centers.
- Sea Salt Finish: Sprinkle a pinch of flaky sea salt on top before baking for a gourmet, flavor-boosting touch.
- Coffee Infusion: Add ½ tsp espresso powder to enhance the chocolate flavor and make it extra rich.
- Chocolate Swap: Mix in white chocolate, caramel chunks, or a combination for a fun twist.
- Gluten-Free Option: Replace all-purpose flour with almond flour or a 1:1 gluten-free blend, still soft and chewy!
Storage & Freezing Instruction
- Room Temperature: Store baked cookies in an airtight container for 3–4 days.
- Refrigerator: Dough or baked cookies can stay fresh up to 5 days.
- Freezing: Freeze dough balls individually in plastic wrap or airtight containers for up to 3 months. Bake directly from frozen — just add 1–2 extra minutes to the baking time.
Tip: Let cookies cool completely before storing to prevent sogginess.
More Cookie Recipes You’ll Love:
- Peanut Butter Stuffed Chocolate Cookies
- Salted Caramel Chocolate Cookies
- Browned Butter Toffee Chocolate Chip Cookies
- Double Chocolate Chip Cookies
- Chocolate Chip Cookies
- Peanut Butter Chocolate Caramel Cookies
- Nutella Chocolate Lava Cookies
- Chocolate Coconut Cookies
FAQs About Brown Butter Chocolate Chip Cookies
Q: Why are my cookies flat?
A: Likely reasons: dough wasn’t chilled, butter was too soft, or cookies were overbaked.
Q: Can I double this recipe?
A: Yes! Just use larger trays or bake in batches and slightly adjust the baking time if needed.
Q: Can I prepare the dough ahead of time?
A: Absolutely! Chilling dough overnight actually enhances flavor and texture.
Q: How do I know when cookies are done?
A: Look for golden edges and a slightly soft center. They’ll firm up while cooling.
Q: Can I use regular butter instead of browned butter?
A: You can, but you’ll miss that signature nutty, caramel flavor that makes these cookies extra special.
Final Thoughts
These Brown Butter Chocolate Chip Cookies are crispy on the edges, chewy in the center, and packed with rich, nutty flavor. With simple pantry ingredients, easy steps, and a few expert tips, you can create bakery-quality cookies at home every single time. Once you try them, regular chocolate chip cookies just won’t compare.
Ready to bake? Grab your ingredients, follow these steps, and share your results! Don’t forget to leave a comment or rating below. We’d love to see how your cookies turned out.
Brown Butter Chocolate Chip Cookies
Ingredients
- 1 ½ cup all-purpose flour
- 1 cup bread flour
- 1 tsp baking soda
- ¼ tsp baking powder
- 1 tsp fine sea salt
- 2 sticks unsalted butter, browned
- ½ cup granulated sugar
- 1 ¼ cup dark brown sugar
- 2 Large eggs + 1 egg yolk
- 2 tsp vanilla extract
Add-ins
- 1 ½ cup semisweet chocolate chips
- 1 cup semisweet chocolate wafers
Optional
- Flaky sea salt for topping
Instructions
- Brown the Butter: Melt butter in a saucepan over medium heat. Swirl until foamy and crackling stops. Continue until brown bits form and nutty aroma develops. Pour into a bowl.
- Add Sugars & Cool: Mix in granulated and brown sugar. Let cool completely.
- Prepare Dry Ingredients: Whisk together flours, baking soda, baking powder, and salt.
- Add Eggs & Vanilla: Mix eggs, yolk, and vanilla into cooled butter-sugar mixture.
- Combine Wet & Dry: Slowly fold in dry ingredients until just combined. Avoid overmixing.
- Add Chocolate: Fold in chocolate chips and wafers evenly.
- Chill Dough: Wrap dough and refrigerate at least 2 hours (overnight preferred).
- Preheat & Scoop: Preheat oven to 350°F (180°C). Scoop 3-tablespoon-sized dough balls onto parchment-lined baking sheets, spacing 3 inches apart.
- Cool: Let cookies rest 5 minutes on tray, then transfer to wire rack.
Notes
- Use room temperature eggs and butter for smooth mixing and a tender cookie.
- Chill the dough for at least 2 hours (or overnight) to enhance flavor and prevent spreading.
- Fold dry ingredients gently; overmixing can make cookies tough.
- Use high-quality chocolate chips or wafers for the best flavor and melty pockets.
- Cookies are best slightly warm, but can be stored in an airtight container or frozen for later.