
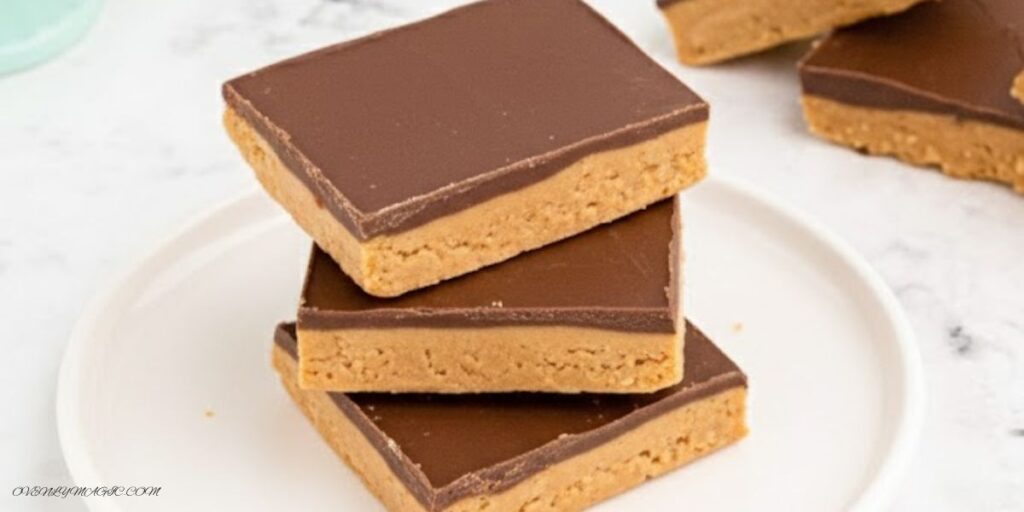
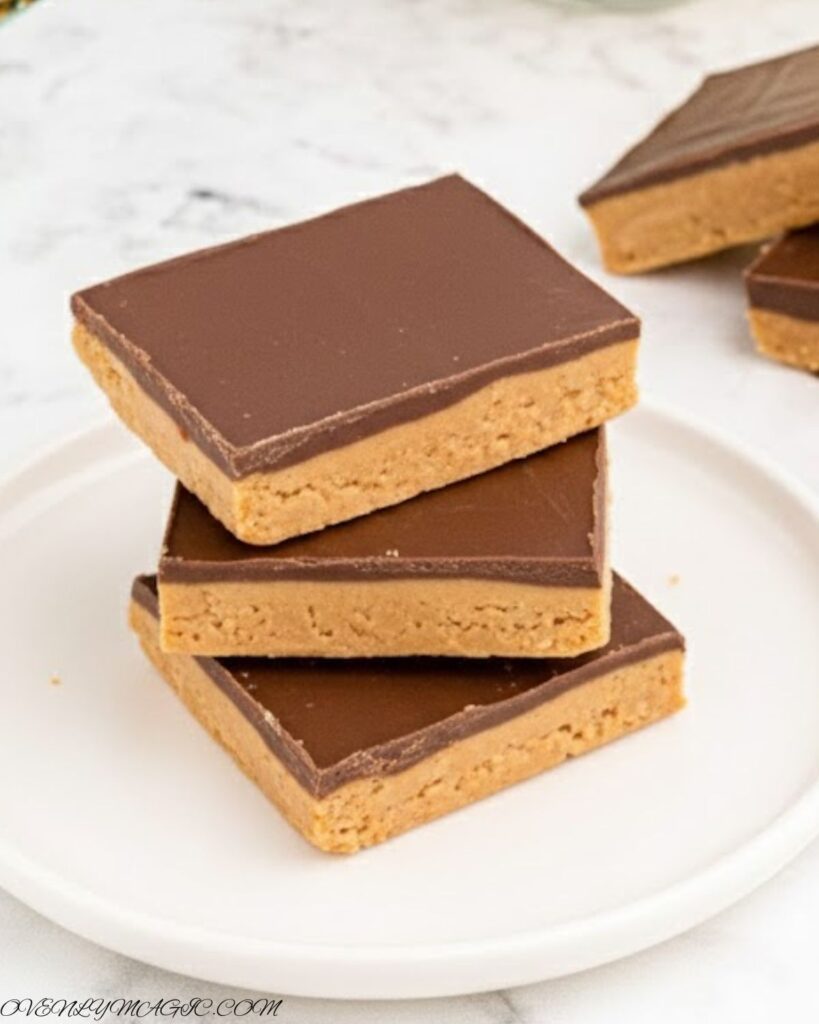
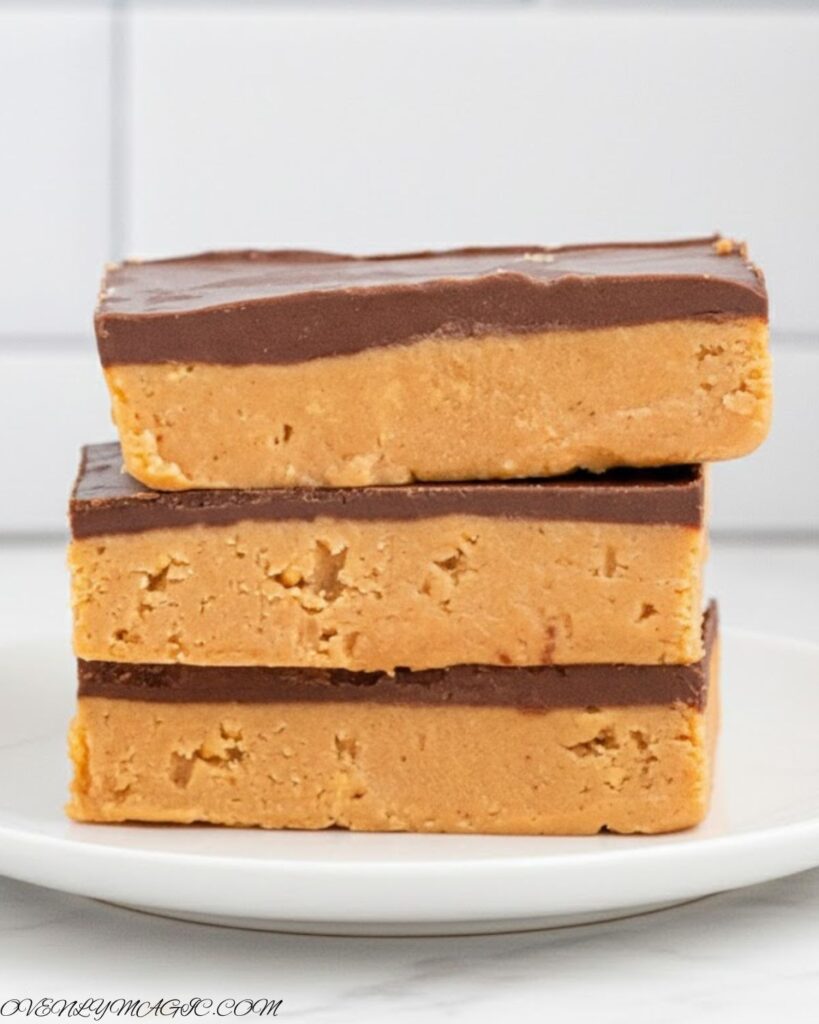
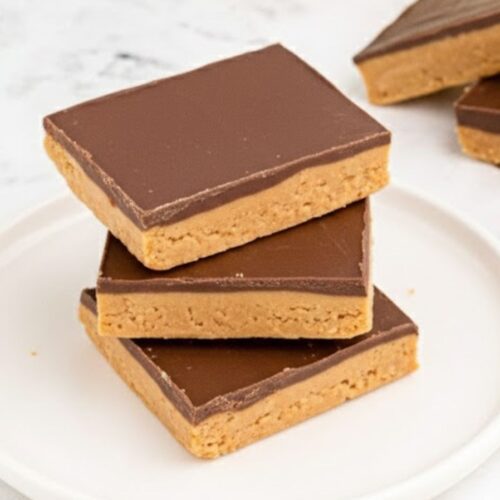
If you’re craving a rich, chocolatey dessert but don’t want to turn on the oven, these No-Bake Peanut Butter Bars are exactly what you need. Made with simple pantry ingredients and basic kitchen equipment, this easy no-bake dessert comes together in minutes and delivers big on flavor.
With a smooth peanut butter base and a luscious chocolate topping, these bars taste just like a homemade version of your favorite peanut butter cups but without any baking, fuss, or special skills. Whether you’re making a quick dessert for guests, a sweet treat for kids, or a no-oven dessert for hot days, this recipe is guaranteed to become a go-to favorite.
Why You’ll Love These No-Bake Peanut Butter Bars
- No baking required: No oven, no stress just mix, chill, and enjoy.
- Beginner-friendly: Even if you’ve never made dessert bars before, this recipe is almost impossible to mess up.
- Rich peanut butter & chocolate flavor: The classic combination delivers a perfectly balanced, indulgent bite every time.
- Minimal ingredients & equipment: Simple pantry staples and basic kitchen tools make this recipe accessible for everyone.
- Perfect for any occasion: From last-minute guests to kids’ snacks, potlucks, or holidays, these bars always impress.
- Make-ahead friendly: They store well in the fridge, making them ideal for busy schedules.
Whether you’re looking for a quick no-bake dessert, a no-oven treat for summer, or an easy peanut butter chocolate bar recipe, this is one you’ll come back to again and again.
Ingredients for No-Bake Peanut Butter Bars
Peanut Butter Layer
- Butter (½ cup / 113 g). Adds richness and creamy texture helps bind the peanut butter layer.
- Creamy Peanut Butter (2 cups / 480 g) Packed with protein, healthy fats, and flavor; gives the bars a smooth, nutty taste.
- Powdered Confectioners’ Sugar (3½ cups / 420 g) Sweetens the bars evenly and creates a smooth, dessert-like texture.
- Vanilla Extract (1½ tsp / 7 ml) Enhances the flavor, making the bars taste richer and more aromatic.
Chocolate Layer
- Chocolate Chips or Chunks (2 cups / 360 g / 12 oz). Adds sweet, chocolatey goodness and a smooth, melt-in-your-mouth topping.
- Butter or Coconut Oil (1 tbsp / 14 g) helps melt the chocolate evenly and gives a shiny, smooth finish.
Equipment Needed for Perfect Baking
- Mixing Bowls – for combining ingredients without making a mess.
- Wooden Spoon or Silicone Spatula – great for mixing the crust and spreading caramel evenly.
- Measuring Cups & Spoons – ensure accurate ingredients for consistent results. (Measuring properly keeps the bars from being too sweet or dry.)
- Parchment Paper – makes it easy to lift bars out and keeps them from sticking. (I always line the pan for quick clean-up.)
How to Make No-Bake Peanut Butter Bars (Step-by-Step)
Step 1: Make the Peanut Butter Layer
In a large mixing bowl, combine ½ cup softened butter, 2 cups creamy peanut butter, 3½ cups powdered sugar, and 1½ teaspoons vanilla extract. Using an electric mixer, beat everything together until smooth. Don’t worry if it’s thick and slightly crumbly, that’s exactly how it should look. This dense texture will give your bars the perfect bite.
Tip: Scrape down the sides of the bowl as you mix to ensure every bit of peanut butter is fully incorporated.
Step 2: Prepare Your Pan
Line a 9×13-inch pan with parchment paper. This ensures easy removal later and keeps your bars intact. Transfer the peanut butter mixture into the pan and press it firmly into an even layer. You want it compact so your bars hold together nicely.
Step 3: Melt the Chocolate
In a microwave-safe bowl, combine 2 cups of chocolate chips and 1 tablespoon of butter or coconut oil. Microwave in 30-second intervals, stirring in between, until the chocolate is fully melted and smooth. This usually takes about 1 ½ minutes total.
Tip: Use a rubber spatula to stir it, which helps melt the chocolate evenly and prevents burning.
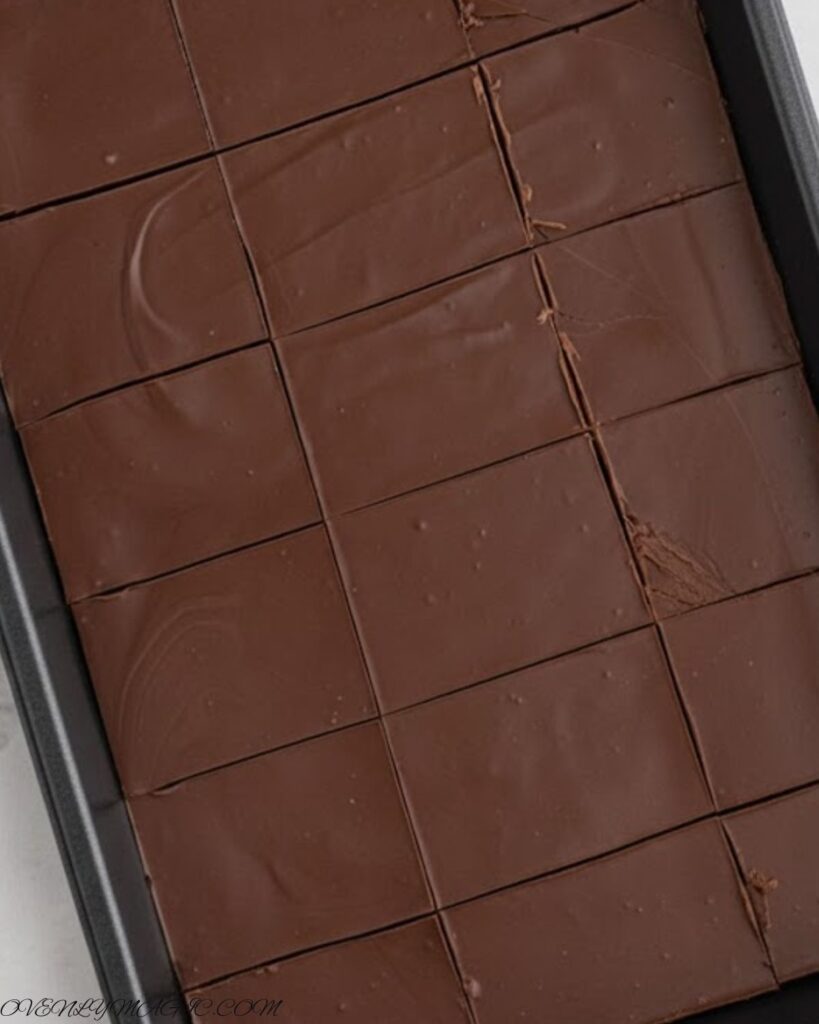
Step 4: Assemble the Bars
Pour the melted chocolate over the peanut butter layer and spread it evenly with a spatula. Take your time here smooth chocolate looks professional and tastes amazing.
Step 5: Set the Chocolate
Let the bars sit at room temperature for 30–60 minutes, or until the chocolate topping is firm to the touch. This step is key to that perfect cut later.
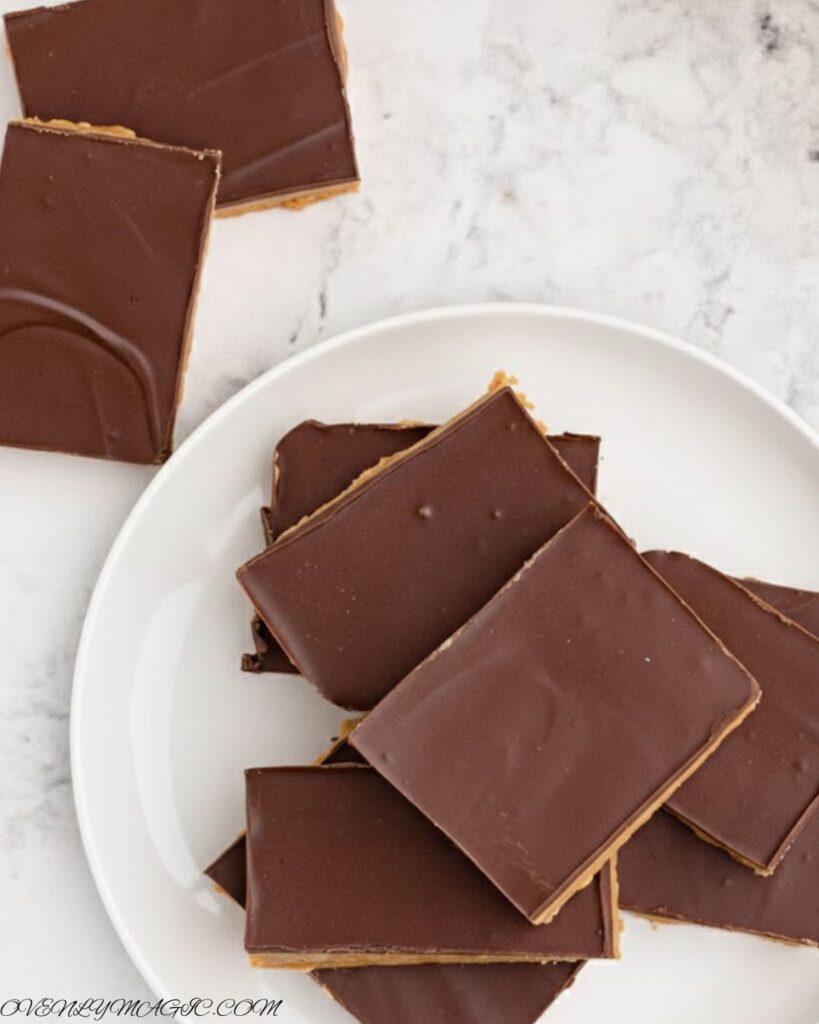
Step 6: Slice and Serve
Carefully lift the bars from the pan using the parchment paper and place them on a cutting board. Use a sharp knife to slice into squares or rectangles.
Tip: For clean cuts, wipe the knife with a warm, damp cloth between slices.
Pro Tips for Perfect Peanut Butter Bars
- Use Creamy Peanut Butter For a smooth and melt-in-your-mouth texture. Chunky peanut butter can make the bars uneven.
- Press the Peanut Butter Layer Firmly: A firm base ensures the bars hold together and cut cleanly. Use a spatula or your hands (lightly greased).
- Melt Chocolate Slowly: Use 30-second microwave intervals or a double boiler. Stir between intervals to prevent burning and get a silky finish.
- Chill Before Cutting. Refrigerating for at least 1 hour makes slicing easy and prevents the chocolate from cracking.
- Use Parchment Paper: Lining the pan makes removing the bars effortless and keeps the edges clean.
- Clean Knife Between Slices: Wipe your knife with a warm, damp cloth for smooth, neat cuts.
- Optional Add-ins: Sprinkle crushed peanuts, sea salt, or even mini chocolate chips on top before the chocolate sets for extra flavor and crunch.
Variations & Substitutions
- Chocolate Swap: Use dark chocolate for a richer, less sweet flavor, or white chocolate for a creamy twist.
- Nut Butter Alternatives: Replace peanut butter with almond butter, cashew butter, or sunflower seed butter for a different nutty taste.
- Gluten-Free Option: Use gluten-free biscuits or graham cracker crumbs instead of regular ones to make the base gluten-free.
- Add Crunch: Sprinkle chopped peanuts, almonds, or walnuts on top of the chocolate layer before it sets.
- Flavor Boosts: Add a pinch of sea salt, cinnamon, or espresso powder to the peanut butter layer for an extra flavor kick.
- Healthier Twist: Swap butter with coconut oil and use dark chocolate with 70% cocoa to make the bars slightly healthier.
Storage
- Refrigerator: Store bars in an airtight container for up to 5 days. This keeps them firm and fresh.
- Freezer: For longer storage, wrap bars individually in plastic wrap or parchment paper, then place in a freezer-safe container. Freeze for up to 2 months. Thaw in the fridge before serving.
- Room Temperature: Bars can sit at room temperature for 1–2 hours if serving immediately, but for the best texture, always chill before cutting.
- Keeping them cold not only helps with clean slicing but also enhances the peanut butter and chocolate flavors.
Check Out These Other Recipes!
- No-Bake Peanut Butter Oat Bars
- Peanut Butter Chocolate Caramel Cookies
- Peanut Butter Brownies
- 4 Ingredient Peanut Butter Cookies
- Peanut Butter Cookie
- Biscoff Butter Cookies
FAQS About This Recipe
1. Can I make these bars without chocolate?
Yes! While the chocolate layer adds richness and a smooth finish, you can skip it for a simple peanut butter bar. You can also drizzle melted chocolate on top instead of a full layer.
2. Can I use crunchy peanut butter instead of creamy?
You can, but creamy peanut butter gives the smoothest texture and makes the bars easier to press and cut. Crunchy peanut butter will add extra texture, which some people love.
3. Do I need an oven for this recipe?
No! This is a true no-bake recipe. All you need is a microwave or a double boiler to melt the chocolate.
4. How long do these bars last?
Store them in an airtight container in the refrigerator for up to 5 days. You can also freeze them for up to 2 months, just thaw in the fridge before serving.
5. Can I make them ahead of time for a party?
Absolutely! These bars are perfect for make-ahead desserts. Prepare them a day or two in advance, keep them refrigerated, and slice right before serving.
6. Can I add toppings or mix-ins?
Yes! Sprinkle crushed nuts, sea salt, or mini chocolate chips on top before the chocolate sets. You can also mix in oats, dried fruit, or even coconut flakes into the peanut butter layer.
Final Thoughts
These no-bake peanut butter bars are proof that simple ingredients and a little guidance can create something truly delicious. Whether you’re a beginner in the kitchen or a seasoned dessert lover, this recipe is easy to follow, quick to make, and impossible not to enjoy.
The creamy peanut butter base, paired with the smooth chocolate topping, makes every bite rich and satisfying, perfect for snacks, parties, or just a sweet treat for yourself. Plus, with the variations, pro tips, and storage tricks, you can customize them to your taste and make them ahead of time with zero stress. So go ahead, give it a try! With minimal equipment, no baking, and maximum flavor, these bars are bound to become a kitchen favorite.
No Bake Peanut Butter Bars Recipe
Ingredients
- ½ cup butter, softened
- 2 cup creamy peanut butter
- 3 ½ cup powdered confectioners’ sugar
- 1 ½ tsp vanilla extract
Chocolate Layer
- 2 cup chocolate chips or chunks
- 1 tbsp butter or coconut oil
Instructions
- In a large bowl, combine butter, peanut butter, powdered sugar, and vanilla. Beat with an electric mixer until smooth. Dough will be thick and slightly crumbly.
- Line a 9×13-inch pan with parchment paper. Press the peanut butter mixture firmly into an even layer.
- Combine chocolate chips and 1 tbsp butter in a microwave-safe bowl. Microwave in 30-second intervals, stirring between, until melted and smooth (~1½ min).
- Pour melted chocolate over the peanut butter layer and spread evenly.
- Let sit at room temperature 30–60 minutes until chocolate sets.
- Lift bars using parchment paper, transfer to a cutting board, and slice with a sharp knife.
- Refrigerate for at least 1 hour before serving.
Notes
- Ingredient Temperature: Make sure your butter and peanut butter are softened for easy mixing.
- Mixing Tip: Beat the peanut butter layer until smooth, but it’s okay if it’s slightly crumbly — that’s normal.
- Pan Size: Use a 9×13-inch pan for perfect thickness; a smaller or larger pan will affect the bar thickness.
- Chocolate Layer: Stir chocolate well while melting to avoid clumps and get a glossy finish.
- Cutting Bars: Chill for at least 1 hour before slicing for clean edges. Use a sharp knife and wipe between cuts.
- Make-Ahead: These bars can be made a day in advance — store in the fridge until ready to serve.
- Customizations: Experiment with nuts, sea salt, or mix-ins for flavor and texture.