
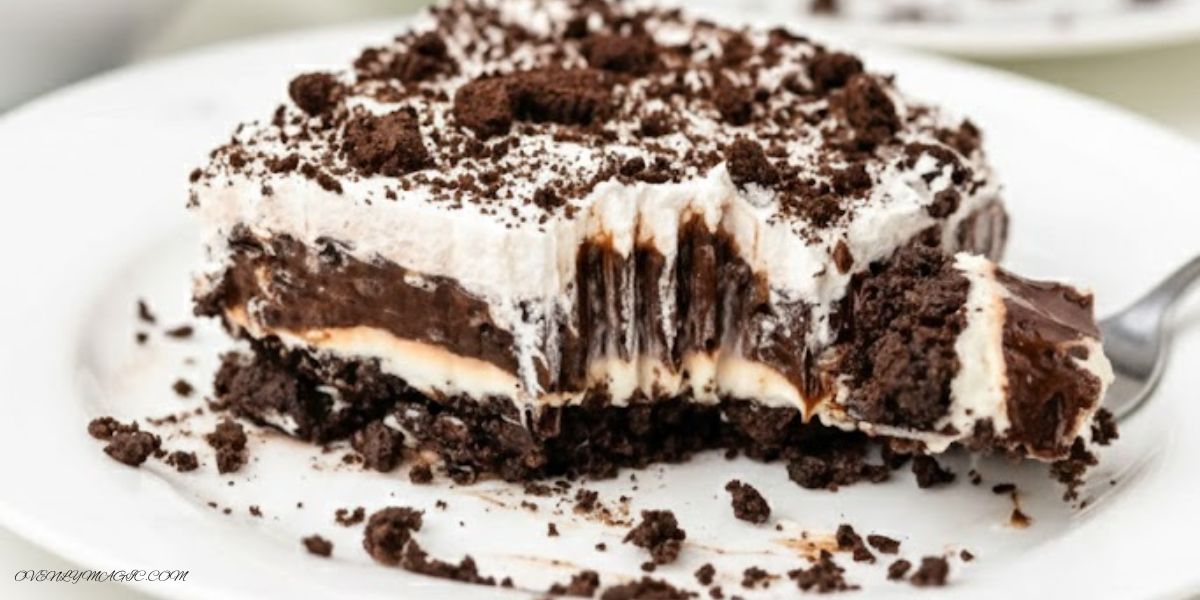
Craving something sweet, but don’t want to turn on the oven? This No-Bake Oreo Dessert is your lifesaver! Quick, creamy, and packed with that classic Oreo crunch, it’s perfect for parties, last-minute treats, or just a cozy dessert at home. Trust me, everyone will be asking for seconds!
Why We Love This No-Bake Oreo Treat
Who doesn’t love Oreos? This dessert brings all that chocolatey, creamy goodness together without ever needing to bake. It’s super quick, effortless, and perfect for satisfying sweet cravings in minutes.
- No Oven Needed: Just mix, chill, and enjoy – ideal for busy days or hot summer afternoons.
- Family & Crowd Pleaser: Kids, friends, and guests all love it. Plus, it’s fun to make together!
- Customizable: Add nuts, caramel, or extra chocolate drizzle to make it your own.
- Perfectly Creamy & Crunchy: The combination of smooth cream cheese and crunchy Oreos hits every dessert craving.
Whether you’re hosting a party or just want a treat for yourself, this dessert is simple, fun, and utterly irresistible.
If you love this, check out my other easy no-bake desserts for quick sweet treats!
Ingredients for Easy No-Bake Oreo Dessert
- Oreo cookies for a crunchy, chocolatey base
- Melted butter to bind the crust together
- Cream cheese makes the layer rich and creamy
- Powdered sugar adds sweetness
- Whipped cream lightens and adds fluffiness
- Instant chocolate pudding mix gives a rich chocolate flavor
- Cold milk to prepare the pudding
- Crushed Oreos add texture and extra Oreo flavor
For topping (optional):
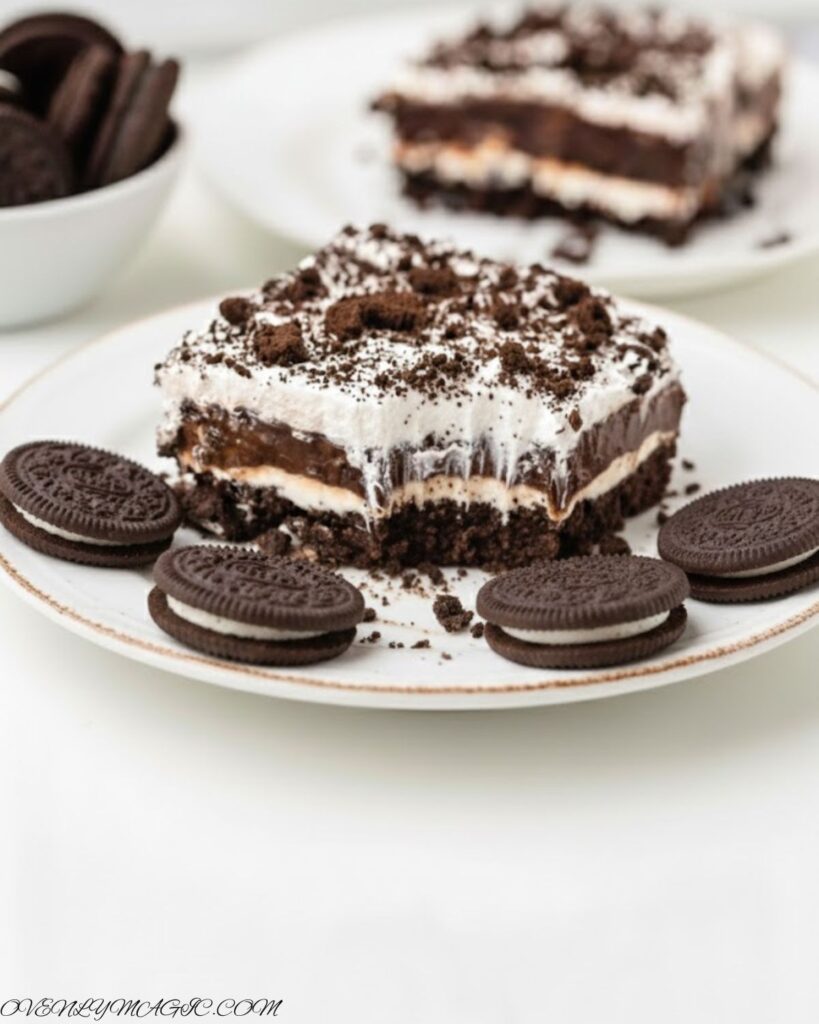
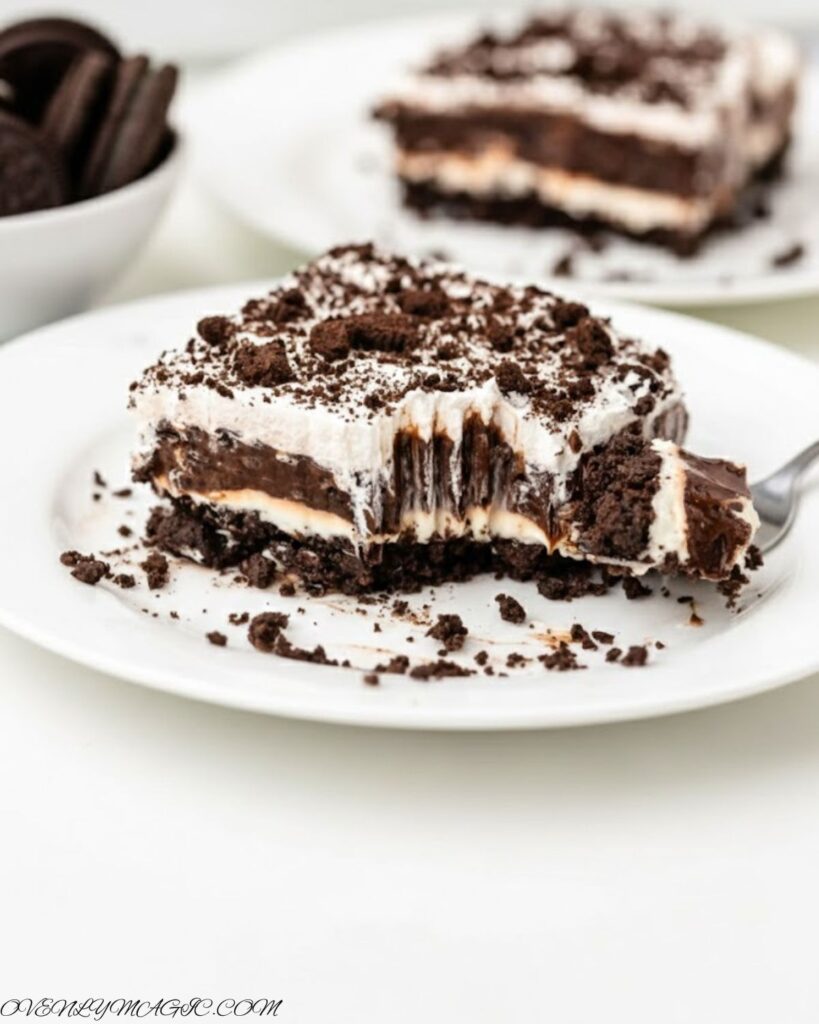
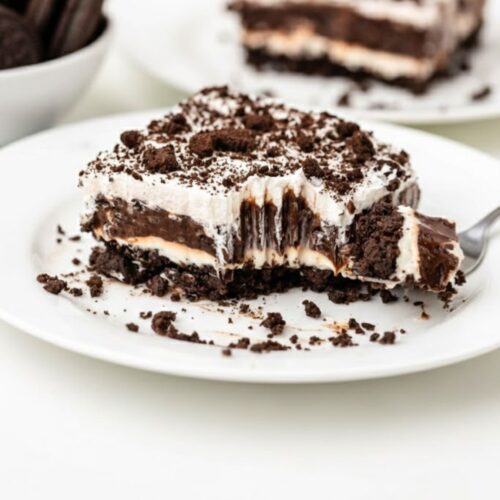
- Extra crushed Oreos garnish for added crunch and visual appeal
Equipment Needed for Quick Oreo Dessert
- Mixing bowls for combining ingredients
- Electric Mixer / Whisk to beat cream cheese and sugar smooth
- Food processor to crush Oreos quickly
- Baking dish to layer and assemble the dessert
- Spoon or spatula to spread layers evenly
- Measuring cups & spoons (optional) – for accurate mixing of pudding and milk
Step-by-Step Instructions to Make No-Bake Oreo Dessert
Prepare the crust
Crush the Oreo cookies until they turn into fine crumbs. You can use a blender, food processor, or place them in a zip-top bag and crush with a rolling pin. Mix the crumbs with melted butter until fully combined. Press the mixture firmly into the bottom of a greased 13×9-inch pan to form an even crust. Chill in the fridge while preparing the next layer.
Make the cream cheese layer
In a mixing bowl, beat the softened cream cheese with powdered sugar until smooth and creamy. Gently fold in part of the whipped cream to lighten the mixture. Spread this creamy layer evenly over the chilled Oreo crust.
Prepare the chocolate pudding layer
In a separate bowl, whisk the instant chocolate pudding mix with cold milk until slightly thickened. Stir in some chopped Oreos for extra texture. Carefully spread the pudding mixture over the cream cheese layer.
Add the whipped cream topping
Spread the remaining whipped cream over the pudding layer, creating a smooth, fluffy finish.
Chill the dessert
Refrigerate the assembled dessert for at least 2–3 hours, or until all layers are set. This step ensures clean slices and firm layers.
Garnish and serve
Before serving, sprinkle extra crushed Oreos on top for added crunch and visual appeal. Slice into portions and enjoy!
Expert Tips for Perfect No-Bake Oreo Treats
- Use cold cream cheese: It’s easier to beat and creates a smoother, creamier layer.
- Chill each layer slightly: Let each layer set a bit before adding the next to avoid mixing and maintain clean, distinct layers.
- Freeze for firmer slices: If you prefer a firmer dessert, pop it in the freezer for 10–15 minutes before cutting.
- Customize toppings: Add extra crushed Oreos, chocolate chips, caramel drizzle, or sprinkles for extra flavor and presentation.
- Layer in cups or jars: Perfect for single servings, parties, or gifting.
- Gentle folding: Fold whipped cream into cream cheese carefully to keep the mixture light and fluffy.
- Even spreading: Use a spatula to smooth each layer, ensuring a professional look for each slice.
Serving Suggestions for Your Oreo Dessert
- Serve chilled: Keep the dessert in the fridge until ready to serve for the perfect creamy texture.
- Pair with drinks: Goes wonderfully with cold milk, coffee, or hot chocolate for an extra indulgent treat.
- Party-ready: Slice into small squares or serve in individual cups for gatherings and potlucks.
- Add a finishing touch: Sprinkle extra crushed Oreos, chocolate shavings, or a drizzle of caramel or chocolate sauce on top for a beautiful presentation.
- Perfect anytime treat: Great for after-dinner desserts, birthday parties, or whenever a sweet craving hits.
Storage Tips for Your No-Bake Oreo Dessert
- Refrigerate: Keep the dessert in an airtight container in the fridge for up to 5 days to maintain freshness and texture.
- Freeze for longer storage: You can freeze portions for up to 2 weeks. Thaw in the fridge before serving to restore creaminess.
- Keep toppings separate (optional): If you plan to freeze, sprinkle extra Oreos or chocolate drizzle just before serving to keep them crisp.
- Avoid room temperature storage: Because of the cream cheese and whipped cream layers, it’s best to keep this dessert chilled at all times.
Try More Easy No-Bake Desserts
- Pistachio Raspberry Cheesecake Domes
- Peanut Butter Chocolate Caramel Cookies
- No-Bake Raspberry Cheesecake
- Caramel Chocolate Crunch Bars
- Vegan Biscoff Cheesecake
FAQs About No-Bake Oreo Dessert
Q: Can I use low-fat cream cheese?
A: Yes! The dessert will still be creamy, though slightly softer in texture.
Q: Can I make this dessert ahead of time?
A: Absolutely! You can prepare it a day in advance and keep it chilled in the fridge until serving.
Q: Can I add extra flavors like peanut butter or caramel?
A: Definitely! Fold in a swirl of peanut butter into the cream cheese layer or drizzle caramel over the top for a delicious twist.
Q: How long should I chill the dessert?
A: At least 2–3 hours to allow all layers to set properly. For firmer slices, you can chill longer or even freeze briefly.
Q: Can I make this in individual cups instead of a pan?
A: Yes! Perfect for parties or gifting. Just layer each cup with crust, cream cheese filling, pudding, and whipped cream.
Final Thoughts on No-Bake Oreo Dessert
This No-Bake Oreo Dessert is the ultimate crowd-pleaser, creamy, chocolatey, and full of that beloved Oreo crunch. It’s effortless to make, fun to layer, and perfect for any occasion, whether it’s a casual treat at home, a party, or a special celebration.
The best part? You don’t need an oven just mix, layer, chill, and enjoy! Customize it with toppings, drizzle, or even individual cups for a personal touch. Once you try this dessert, it’s sure to become a family favorite that everyone will request again and again.
No Bake Oreo Dessert – Easy, Creamy & Quick Treats
Ingredients
- 32 cookies Oreo cookies
- 6 tbsp unsalted butter, melted
- 8 ounces cream cheese, softened
- 1 cup powdered sugar
- 8 ounces whipped cream
- 2 (3 oz) boxes instant chocolate pudding mix
- 3 cup cold milk
- 12 Cookies Oreo cookies, crushed
For topping (optional)
- Extra crushed Oreos – garnish and crunch
Instructions
- Prepare the crust: Crush 32 Oreos into fine crumbs, mix with 6 tablespoons melted butter, press into a greased 13×9 inch pan, and chill.
- Cream cheese layer: Beat 8 oz cream cheese with 1 cup powdered sugar, fold in 1 cup whipped cream, spread over crust.
- Chocolate pudding layer: Mix 2 boxes pudding mix with 3 cups cold milk, stir in 10–12 crushed Oreos, spread over cream cheese layer.
- Whipped cream topping: Spread remaining 7–8 oz whipped cream over pudding layer.
- Chill & serve: Refrigerate 2–3 hours, garnish with extra Oreos, slice, and enjoy!
Notes
- Chill Time Matters: For clean slices and perfectly set layers, make sure to refrigerate the dessert for at least 2–3 hours.
- Layer Gently: When spreading each layer, be careful not to mix them together; use a spatula and smooth gently.
- Custom Flavors: You can swirl in peanut butter, Nutella, or caramel into the cream cheese layer for a twist.
- Serving Options: For parties, try layering in small cups or jars for individual portions.
- Make Ahead Friendly: This dessert can be prepared a day in advance and stored in the fridge, making it ideal for holidays or gatherings.
- Toppings: Add extra crushed Oreos, chocolate shavings, or sprinkles just before serving to keep them crunchy and visually appealing.
- Freezing Tip: If you need to store longer, freeze the dessert for up to 2 weeks. Thaw in the fridge before serving.